Simple API server
Deno is great for creating simple, light-weight API servers. Learn how to create and deploy one using Deno Deploy in this tutorial.
Create a local API server
In your terminal, create a file named server.ts. We'll implement a simple link
shortener service using a Deno KV database.
const kv = await Deno.openKv();

Deno.serve(async (request: Request) => {
  // Create short links
  if (request.method == "POST") {
    const body = await request.text();
    const { slug, url } = JSON.parse(body);
    const result = await kv.set(["links", slug], url);
    return new Response(JSON.stringify(result));
  }

  // Redirect short links
  const slug = request.url.split("/").pop() || "";
  const url = (await kv.get(["links", slug])).value as string;
  if (url) {
    return Response.redirect(url, 301);
  } else {
    const m = !slug ? "Please provide a slug." : `Slug "${slug}" not found`;
    return new Response(m, { status: 404 });
  }
});
You can run this server on your machine with this command:
deno run -A --unstable server.ts
This server will respond to HTTP GET and POST requests. The POST handler
expects to receive a JSON document in request the body with slug and url
properties. The slug is the short URL component, and the url is the full URL
you want to redirect to.
Here's an example of using this API endpoint with cURL:
curl --header "Content-Type: application/json" \
  --request POST \
  --data '{"url":"https://docs.deno.com/runtime/manual","slug":"denodocs"}' \
  http://localhost:8000/
In response, the server should send you JSON with the KV data representing the
result of the set operation:
{ "ok": true, "versionstamp": "00000000000000060000" }
A GET request to our server will take a URL slug as a path parameter, and
redirect to the provided URL. You can visit this URL in the browser, or make
another cURL request to see this in action!
curl -v http://localhost:8000/denodocs
Now that we have an API server, let's push it to a GitHub repository that we'll later link to Deno Deploy.
Create a GitHub repository for your app
Sign in to GitHub and create a new repository. You can skip adding a README or any other files for now - a blank repo will do fine for our purposes.
In the folder where you created your API server, initialize a local git repo
with these commands in sequence. Be sure to swap out your_username and
your_repo_name with the appropriate values.
echo "# My Deno Link Shortener" >> README.md
git init
git add .
git commit -m "first commit"
git branch -M main
git remote add origin https://github.com/your_username/your_repo_name.git
git push -u origin main
You should now have a GitHub repository with your server.ts file in it, as in
this example repository. Now
you're ready to import and run this application on Deno Deploy.
Import and deploy your appliction project
Next, sign up for an account on Deno Deploy and create a new project. Choose to import an existing GitHub repository - the one we created a moment ago. The configuration should look something like this:
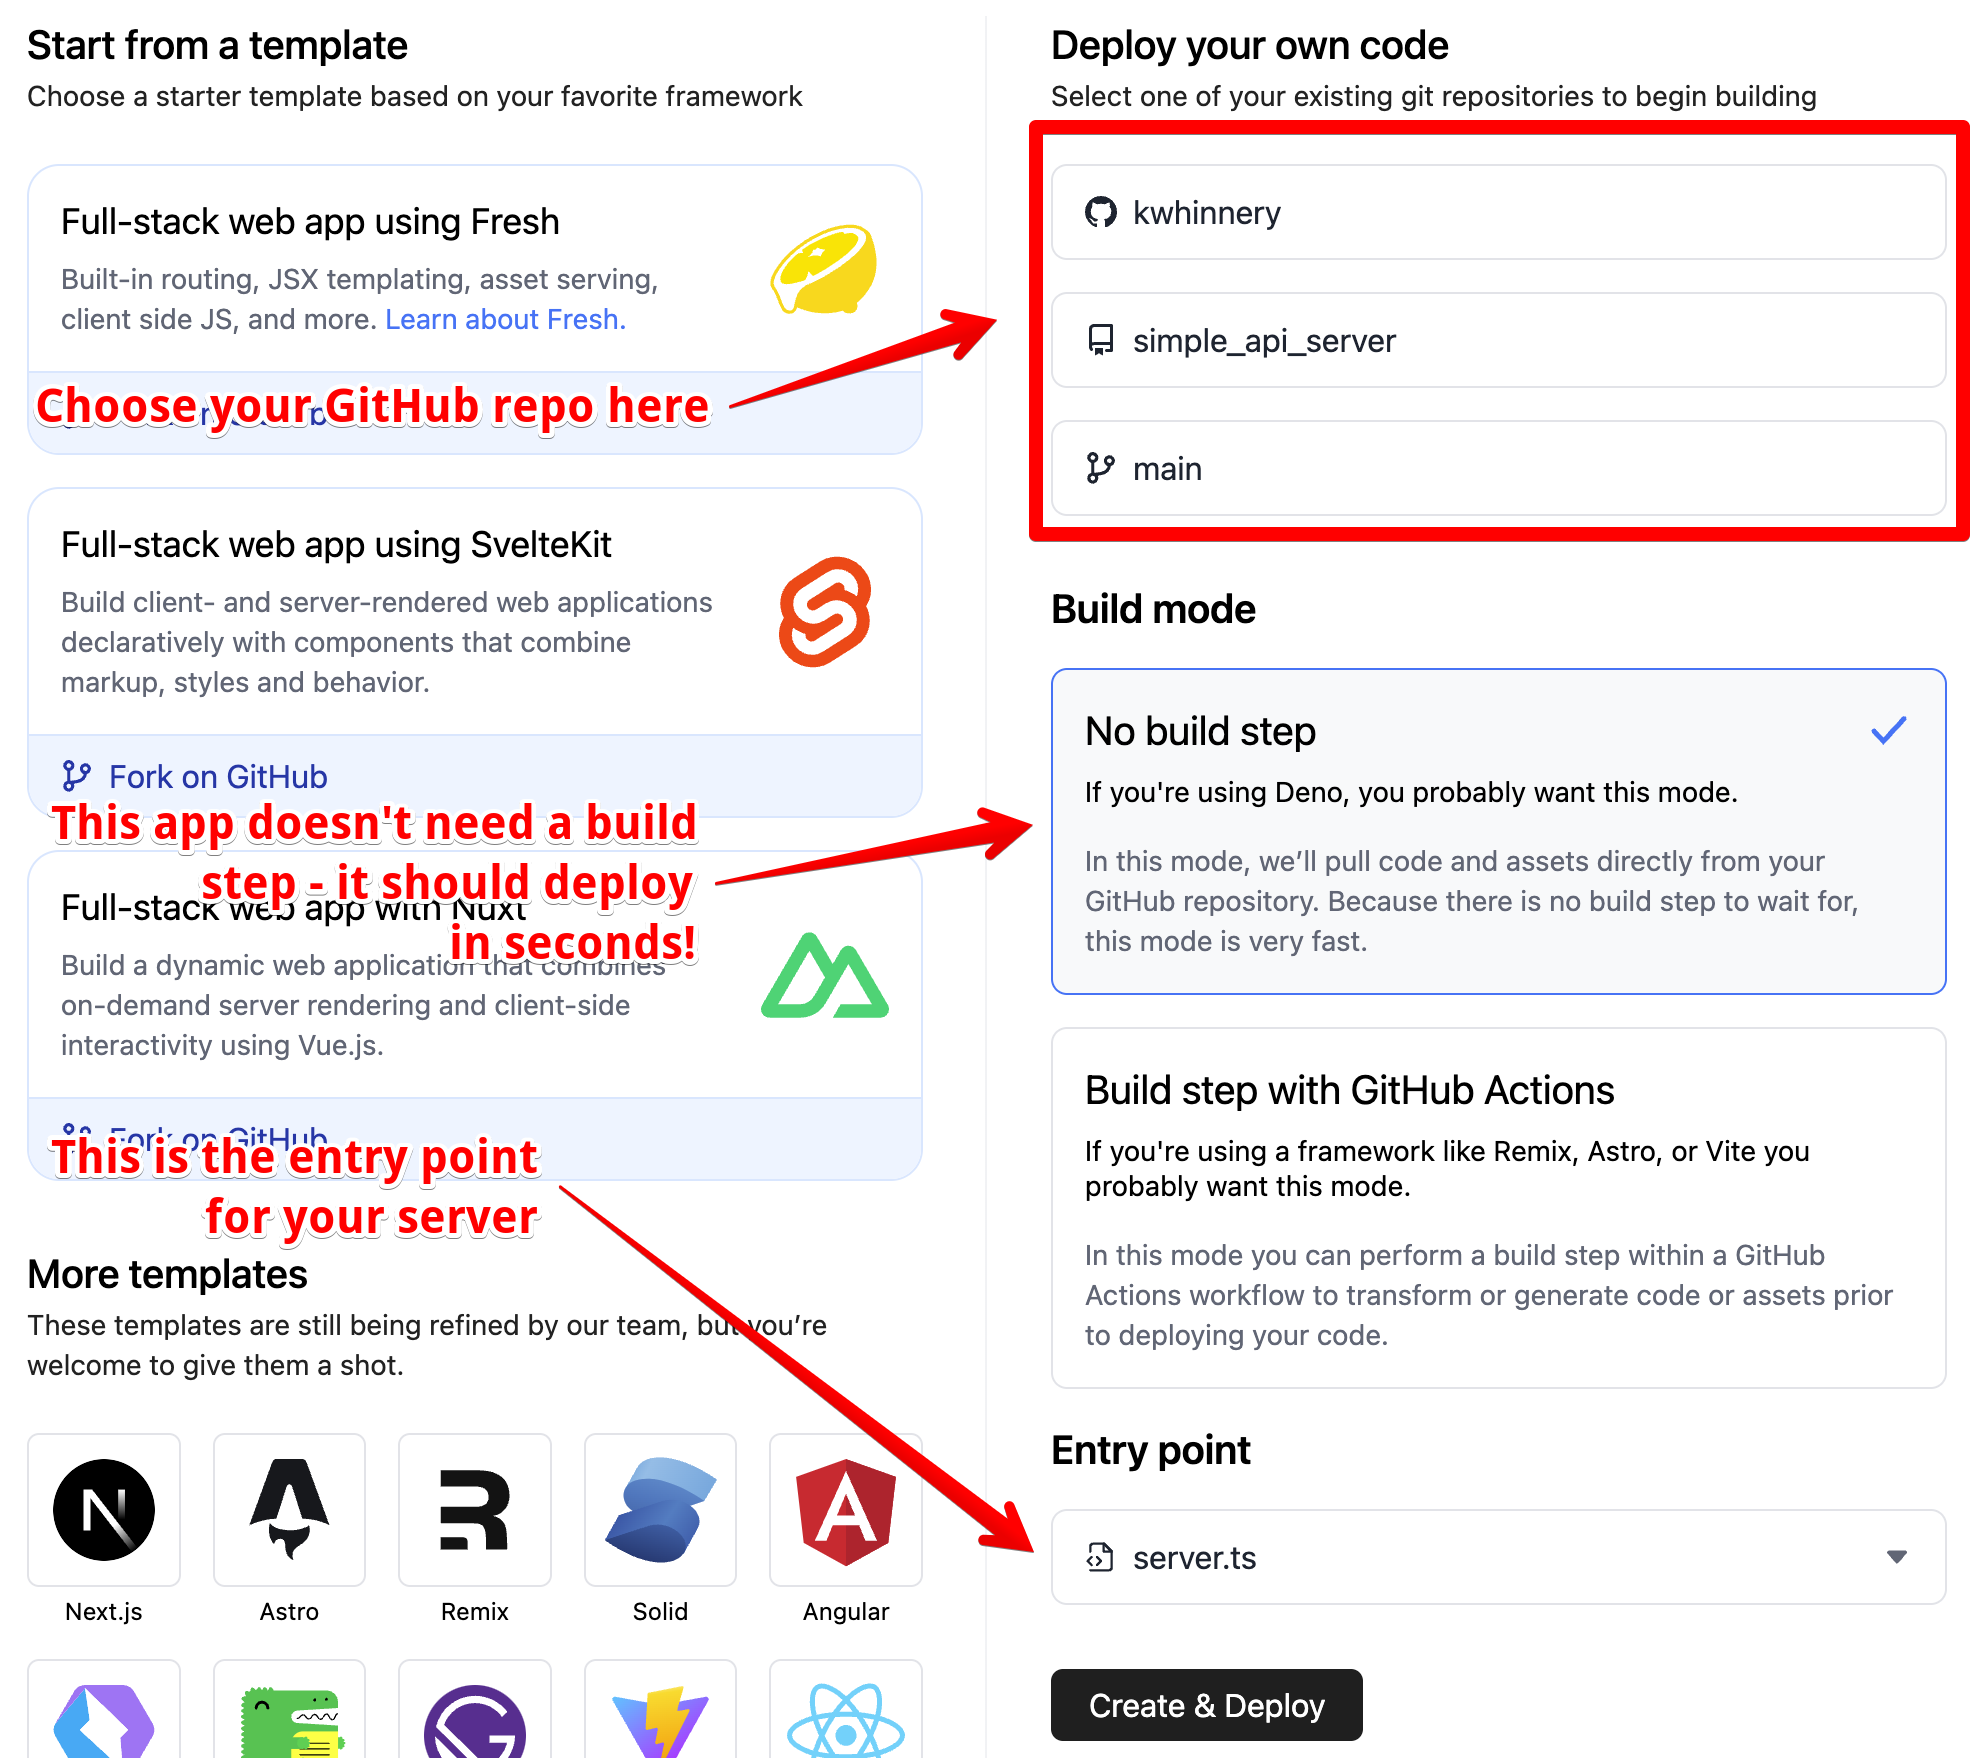
Click on the "Create and Deploy" button - in a few moments, your link shortener service will be live on Deno Deploy!
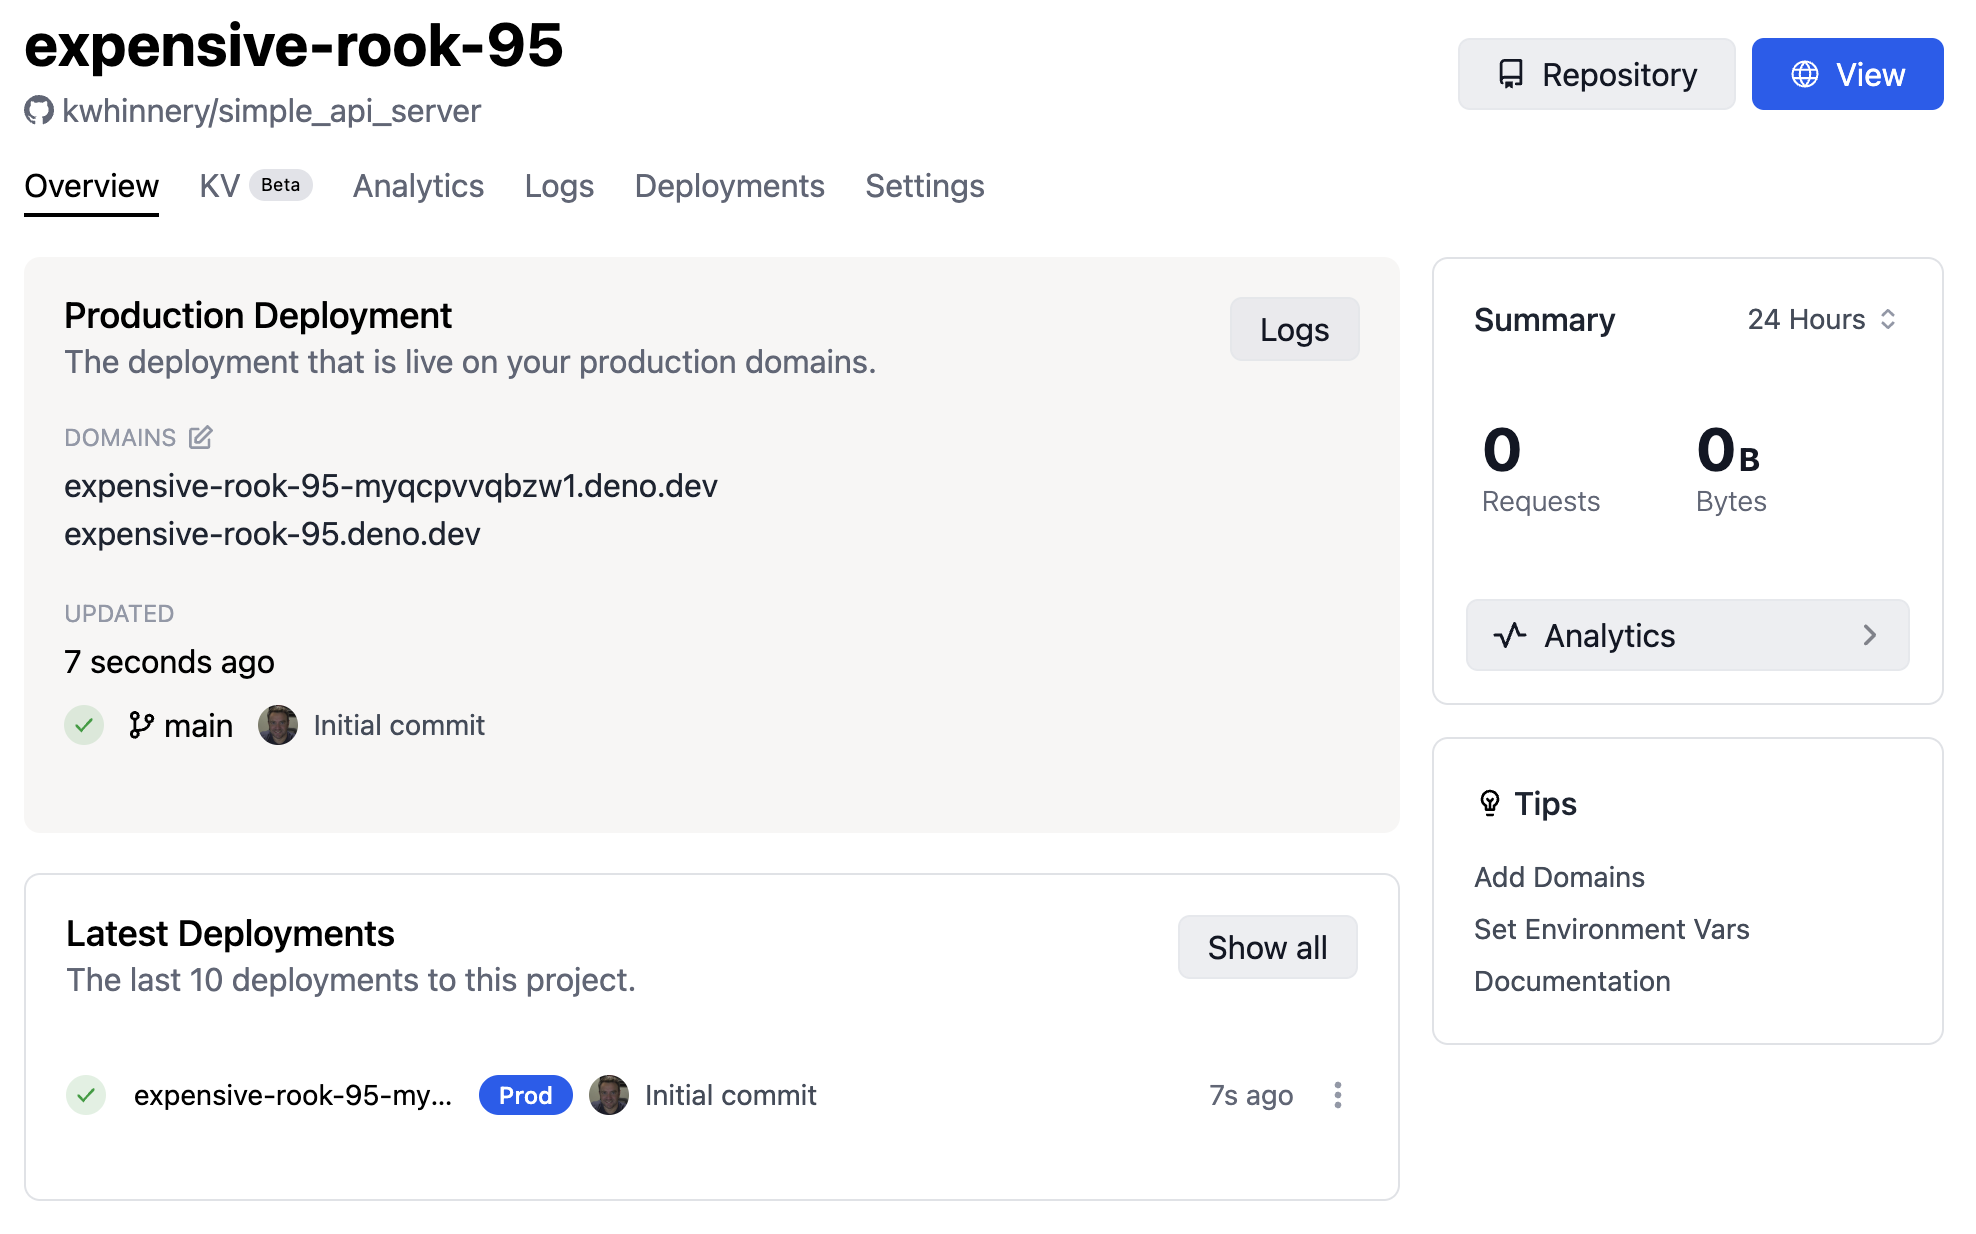
Test out your new link shortener
Without any additional configuration (Deno KV just works on Deploy), your app should run the same as it did on your local machine.
You can add new links using the POST handler as you did before. Just replace
the localhost URL with your live production URL on Deno Deploy:
curl --header "Content-Type: application/json" \
  --request POST \
  --data '{"url":"https://docs.deno.com/runtime/manual","slug":"denodocs"}' \
  https://expensive-rook-95.deno.dev/
Similarly, you can visit your shortened URLs in the browser, or view the redirect coming back with a cURL command:
curl -v https://expensive-rook-95.deno.dev/denodocs
This was a very simple example - from here, we suggest you check out a higher-level web framework like Fresh, or learn more about Deno KV here. Great work deploying your simple API server!